Introduction
HoloBuild Library
The main library that we will be using and that is part of the buildwagon platform is HoloBuild, a library that creates dynamic holograms and provides a collection of components intended to accelerate the development of HoloLens applications. You can access the library at: https://www.buildwagon.com/documentation/
Buildwagon Online Editor
We’ll use the Buildwagon Online Editor to do our programming.
Buildwagon runs right inside a browser, it lets us type our programming code and see the results
immediately.
Open the public Buildwagon Editor to try things out using your web browser at the following link buildwagon online editor. It should look something like this.
You will notice that Buildwagon allows you to experiment with the code and visualize what you are programming. If your aim is to work on more detailed projects, and to save your code, you have to create a profile at buildwagon and get access to a personalized dashboard that could host your projects.
3D Objects
You should first get familiar with the concept of 3D objects that are at the core of our work.
Any 3D object is made up of a specific shape or geometry. The shape is usually formed of small building blocks that depict a general shape like a prism, a sphere,
a cube, or any other specific shape. Let’s take the cube as an example.
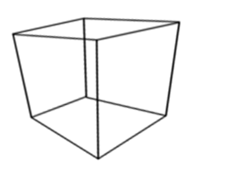
The geometry of the object is like an empty skeleton that could be covered with a specific material, color, pattern, or image.
Once we dress up the geometry (or shape) with the material (or cover) we get a HoloMesh, which is the interweaving of the geometry (shape) and the material (cover) together. The names 3D object, HoloMesh, or Hologram basically all mean the same thing in our context.
This is great but let’s not get ahead of ourselves!
In order to create a HoloMesh (or Hologram), you need a space to host it. This space is where the action takes place and where different holograms can interact and communicate with each other.
So far we have a space where the HoloMesh exist. For us to see the HoloMesh, we need a camera (or a HoloCamera). Think of this concept as a movie production.
Action can happen throughout the space, but we are only able to see the action through the camera. In our example, the cube is the action, but if the camera is not
looking at the cube, we will not be able to see it.
The HoloCamera will look at the space from a particular angle or perspective. What is nice about mixed reality, is that users can decide what angle to explore in a
particular space, and how to interact with the holograms according to preference. In a hololens based mixed reality, the Holocamera is represented by the Hololens device (the hardware
you are wearing) and where it is looking at; So, the person wearing the Hololens decides where the camera is looking at. He is the director and the audience at the same time.
Ok, let’s move from narrating to coding. Let’s play around with different shapes, and explore the attributes along the way.
First, we will start by setting a space, and place a camera that oversees that space. From Buildwagon's Library, we can learn more about the HoloSpace component.
A HoloSpace represents a holographic scene, and its main purpose is to act as a container for all the holograms that make up the scene.
The code to define the space is:
var holoscene = new HoloBuild.HoloSpace();
Similarly, a HoloCamera represents the HoloLens and where it is looking at. To create a new HoloCamera instance you can call:
var Hololens = new HoloBuild.HoloCamera();
Once we have the space and the camera, we need to define a renderer, and ask it to draw (or render) the space on that camera:
var holorenderer =  new HoloBuild.HoloRenderer();
holorenderer.render(holoscene, hololens);
In a real, animated application the render call should be made multiple times per second(Frames Per Second). This is where the animation loop comes into play. Please look at the "Looping and Animation" section at the bottom of this tutorial for more details.
function animation() {
    window.requestAnimationFrame(animation);
    holorenderer.render(holoscene, hololens);
}
animation();
Now, our set-up should look like this:
var hololens = new HoloBuild.HoloCamera();
var holoscene = new HoloBuild.HoloSpace();
var holorenderer = new HoloBuild.HoloRenderer();

function animation() {
    window.requestAnimationFrame(animation);
    holorenderer.render(holoscene, hololens);
}
animation();
Now that we have our landscape set, let’s start adding shapes.
The process of adding shapes is usually similar regardless of the shape's details. It involves the following steps:
- Define the new geometric shape.
- Cover it with material, pattern, or image.
- Dress the geometric shape with the cover to create a HoloMesh (connect them together as a mesh)
- Add the new shape to the space
Creating Shapes
Let’s create a box, then a ball, then a platform, then a pyramid!!
You will notice that we are following the above process, with minor differences.
A Box
Let’s create a box following the process above.
- To create a box, you need to create the 3D geometry shape of a box. From the Holobuild library you can get the code of adding a box.
The HoloBoxGeometry is the library component of a 3 dimensional box or a cube.
It involves defining the 3 parameters of a box:
- Width
- Height
- Depth
var boxgeometry = new HoloBuild.HoloBoxGeometry( 0.1, 0.2, 0.3 );
The 0.1, 0.2, and 0.3 represent the respective values of width, height, and depth of the box in meters. - To cover the boxgeometry with a material, you can use one of the materials available in the Holobuild library such as HoloMeshBasicMaterial or
HoloMeshStandardMaterial. These two functions in a similar manner; they describe the geometry appearance such as its color and texture.
The HoloMeshStandardMaterial gives a more realistic look, but at the same time requires more computational resources.
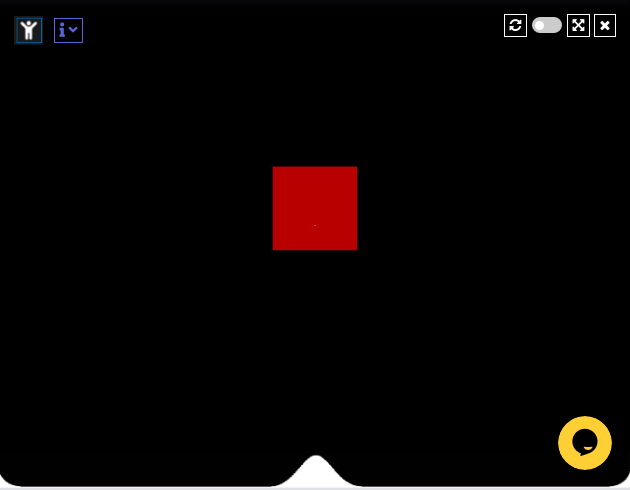
The ‘color’ is one parameter of the material element, that could be defined accordingly. In this case, we have chosen ‘red’ for the material color.var boxmaterial = new HoloBuild.HoloMeshStandardMaterial( { color: 'red' } ); - Simply connect the boxmaterial with the boxgeometry by using the HoloMesh component from the library:
var boxmesh= new HoloBuild.HoloMesh( boxgeometry, boxmaterial ); - 4- Lastely, add the new shape to the space so that we see it on the Hololens:
holoscene.add(boxmesh);
Now, our editor should look something like this:
var hololens = new HoloBuild.HoloCamera();
var holoscene = new HoloBuild.HoloSpace();
var holorenderer = new HoloBuild.HoloRenderer();

var boxgeometry = new HoloBuild.HoloBoxGeometry(0.1,0.1,0.1);
var boxmaterial = new HoloBuild.HoloMeshStandardMaterial( { color: 'red' } );
var boxmesh = new HoloBuild.HoloMesh(boxgeometry,boxmaterial);
holoscene.add(boxmesh);

function animation() {
    window.requestAnimationFrame(animation);
    holorenderer.render(holoscene, hololens);
}
animation();
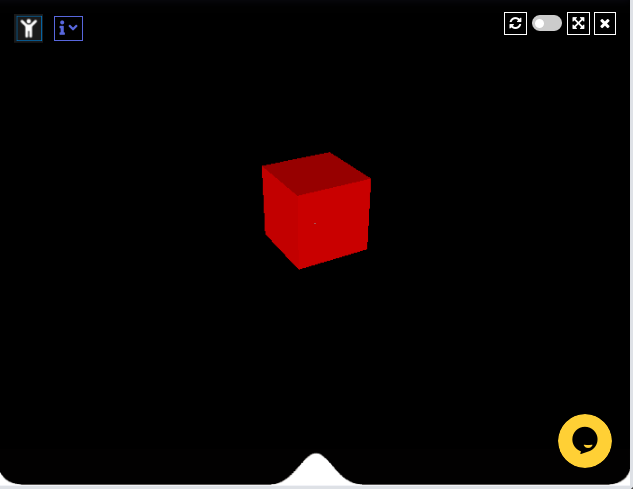
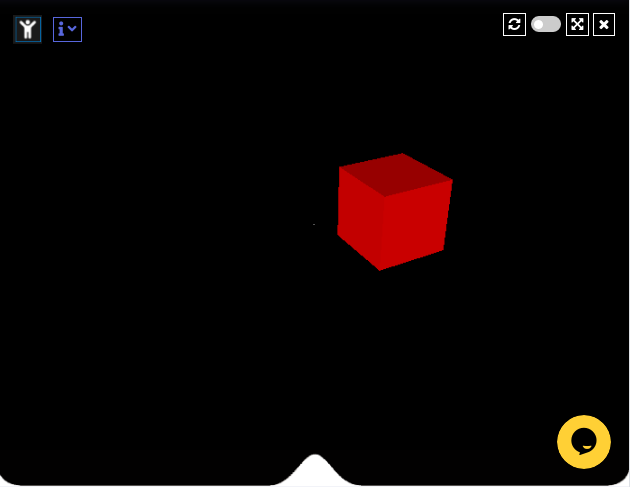
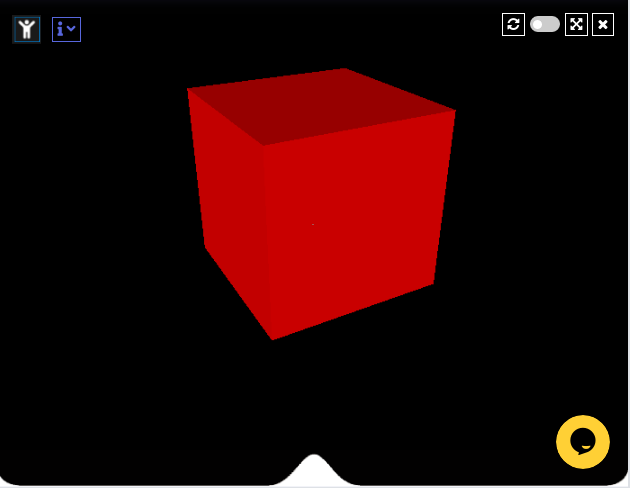
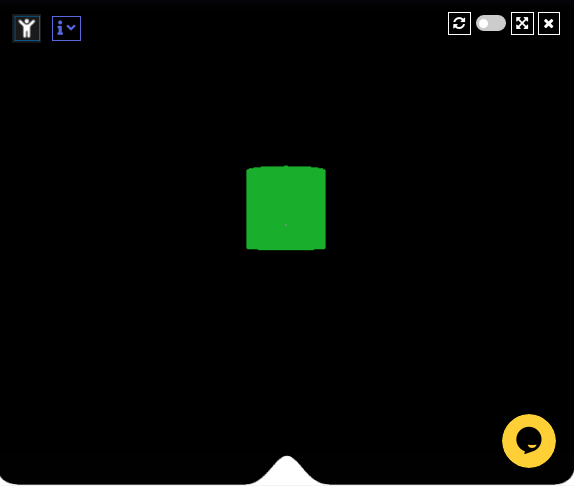
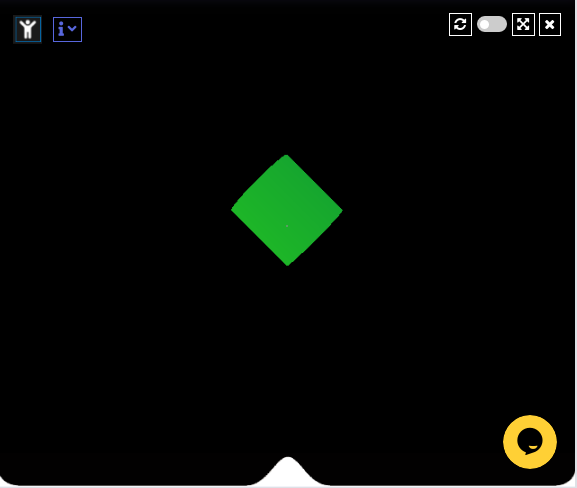
You will notice that the box looks more like a square in 2D dimensions. That’s not what is expected. It is frustrating to see a square instead of a box. This is simply because we are looking to only one side of the box, a façade. In order to see more than one side, we need to move the camera or turn the box.
Rotate
Let’s turn the box by rotating the mesh using the following code.
boxmesh.rotation.set(0.5,0.5,0);
The above code will rotate the box to make it more visible in a 3D setting.
The 0.5, 0.5, 0 are coordinates used in 3D visualization. This is what we are going to explain next before we continue with the other shapes.
If you run the Emulator after adding the rotation code, you should get something like below. Now we can see 3 different sides of the box instead of only one.
This is looking more exciting!
var hololens = new HoloBuild.HoloCamera();
var holoscene = new HoloBuild.HoloSpace();
var holorenderer = new HoloBuild.HoloRenderer();

var boxgeometry = new HoloBuild.HoloBoxGeometry(0.1,0.1,0.1);
var boxmaterial = new HoloBuild.HoloMeshStandardMaterial( { color: 'red' } );
var boxmesh = new HoloBuild.HoloMesh(boxgeometry,boxmaterial);
holoscene.add(boxmesh);
boxmesh.rotation.set(0.5,0.5,0);

function animation() {
    window.requestAnimationFrame(animation);
    holorenderer.render(holoscene, hololens);
}
animation();
3D Coordinates
The 3D coordinate system refers to 3-axes: X, Y, and Z. Using these axes we can refer to any position displayed in a 3 dimensional space. The system considers the
exact center of the space as the origin with coordinate 0,0,0.
Accordingly, we can position the 3D objects (holograms) in relation to the origin by changing the coordinates of the X, Y, and Z. Let’s understand the axes further.
The X axis, operates on a horizontal level across the screen (left-right), moving from-ve to +ve the more we shift from left to right.
The Y axis, operates on a vertical level of the screen (down-up), moving from –ve to +ve the more we shift from down to up.
As we are working in 3D, we need the Z axes to represent the object’s depth position. The Z axis, operates on a diagonal level of the screen (far-near),
moving from-ve to +ve the more we shift towards the camera (Hololens).
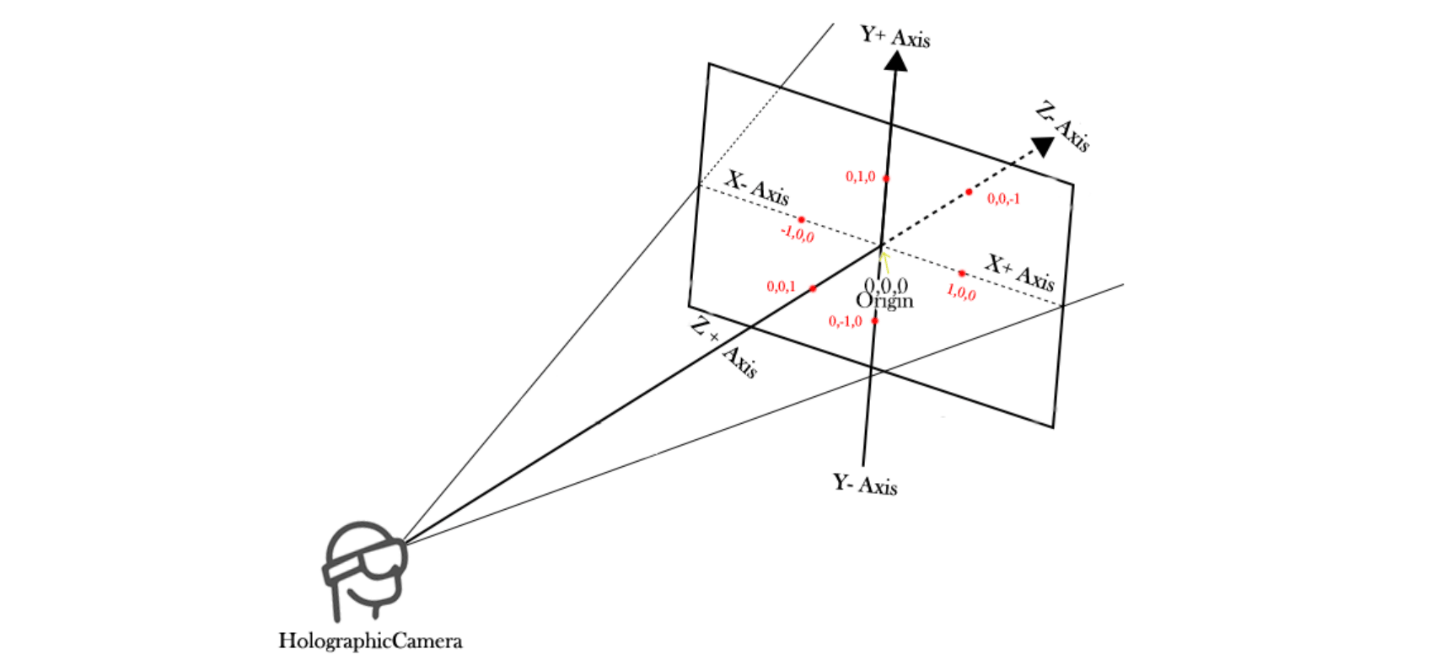
Using these 3 axes, we can now refer to any position by using 3 numbers to represent x, y, and z . This can be referred to as a “vector” and contains all the information we need to position an object anywhere in the space.
For example, if I want my box to be in the center of the space, I can position it by adding the following code:
boxmesh.position.set(0,0,0);
It will look as such:
var hololens = new HoloBuild.HoloCamera();
var holoscene = new HoloBuild.HoloSpace();
var holorenderer = new HoloBuild.HoloRenderer();

var boxgeometry = new HoloBuild.HoloBoxGeometry(0.1,0.1,0.1);
var boxmaterial = new HoloBuild.HoloMeshStandardMaterial( { color: 'red' } );
var boxmesh = new HoloBuild.HoloMesh(boxgeometry,boxmaterial);
holoscene.add(boxmesh);
boxmesh.rotation.set(0.5,0.5,0);
boxmesh.position.set(0,0,0);

function animation() {
    window.requestAnimationFrame(animation);
    holorenderer.render(holoscene, hololens);
}
animation();
To move the box on the x axis to the right, the code will change to:
boxmesh.position.set(0.1,0,0);
It will look as such:
var hololens = new HoloBuild.HoloCamera();
var holoscene = new HoloBuild.HoloSpace();
var holorenderer = new HoloBuild.HoloRenderer();

var boxgeometry = new HoloBuild.HoloBoxGeometry(0.1,0.1,0.1);
var boxmaterial = new HoloBuild.HoloMeshStandardMaterial( { color: 'red' } );
var boxmesh = new HoloBuild.HoloMesh(boxgeometry,boxmaterial);
holoscene.add(boxmesh);
boxmesh.rotation.set(0.5,0.5,0);
boxmesh.position.set(0.1,0,0);

function animation() {
    window.requestAnimationFrame(animation);
    holorenderer.render(holoscene, hololens);
}
animation();
Going back to the origin position, to move the box on the x axis to the left, the code will change to:
boxmesh.position.set(-0.1,0,0);
It will look as such:
var hololens = new HoloBuild.HoloCamera();
var holoscene = new HoloBuild.HoloSpace();
var holorenderer = new HoloBuild.HoloRenderer();

var boxgeometry = new HoloBuild.HoloBoxGeometry(0.1,0.1,0.1);
var boxmaterial = new HoloBuild.HoloMeshStandardMaterial( { color: 'red' } );
var boxmesh = new HoloBuild.HoloMesh(boxgeometry,boxmaterial);
holoscene.add(boxmesh);
boxmesh.rotation.set(0.5,0.5,0);
boxmesh.position.set(-0.1,0,0);

function animation() {
    window.requestAnimationFrame(animation);
    holorenderer.render(holoscene, hololens);
}
animation();
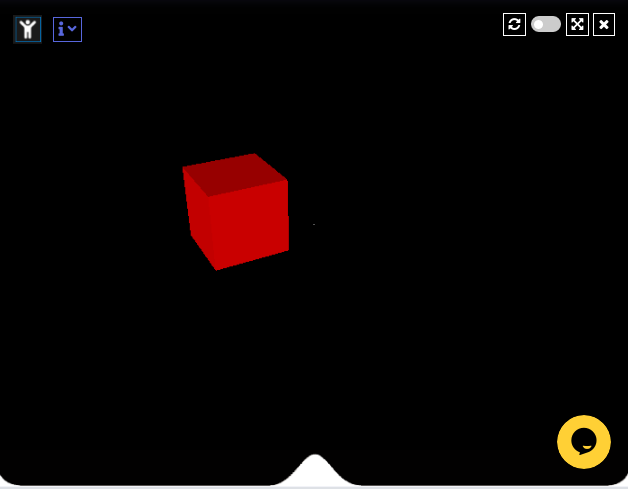
Going back to the origin position, to move the box on the y axis to the top of my screen, the code will change to:
boxmesh.position.set(0,0.2,0)
It will look as such:
var hololens = new HoloBuild.HoloCamera();
var holoscene = new HoloBuild.HoloSpace();
var holorenderer = new HoloBuild.HoloRenderer();

var boxgeometry = new HoloBuild.HoloBoxGeometry(0.1,0.1,0.1);
var boxmaterial = new HoloBuild.HoloMeshStandardMaterial( { color: 'red' } );
var boxmesh = new HoloBuild.HoloMesh(boxgeometry,boxmaterial);
holoscene.add(boxmesh);
boxmesh.rotation.set(0.5,0.5,0);
boxmesh.position.set(0,0.2,0);

function animation() {
    window.requestAnimationFrame(animation);
    holorenderer.render(holoscene, hololens);
}
animation();
Always starting from the origin position, to move the box on the y axis to the bottom of my screen, the code will change to:
boxmesh.position.set(0,-0.2,0);
It will look as such:
var hololens = new HoloBuild.HoloCamera();
var holoscene = new HoloBuild.HoloSpace();
var holorenderer = new HoloBuild.HoloRenderer();

var boxgeometry = new HoloBuild.HoloBoxGeometry(0.1,0.1,0.1);
var boxmaterial = new HoloBuild.HoloMeshStandardMaterial( { color: 'red' } );
var boxmesh = new HoloBuild.HoloMesh(boxgeometry,boxmaterial);
holoscene.add(boxmesh);
boxmesh.rotation.set(0.5,0.5,0);
boxmesh.position.set(0,-0.2,0);

function animation() {
    window.requestAnimationFrame(animation);
    holorenderer.render(holoscene, hololens);
}
animation();

Going back to the origin position, to move the box on the z axis, we will be working with the depth position. To move the object away from the camera (Hololens), the code will change to a -ve value for the z coordinate. You will notice that the box is now far from the camera more into the core of the screen.
boxmesh.position.set(0,0,-4);
var hololens = new HoloBuild.HoloCamera();
var holoscene = new HoloBuild.HoloSpace();
var holorenderer = new HoloBuild.HoloRenderer();

var boxgeometry = new HoloBuild.HoloBoxGeometry(0.1,0.1,0.1);
var boxmaterial = new HoloBuild.HoloMeshStandardMaterial( { color: 'red' } );
var boxmesh = new HoloBuild.HoloMesh(boxgeometry,boxmaterial);
holoscene.add(boxmesh);
boxmesh.rotation.set(0.5,0.5,0);
boxmesh.position.set(0,0,-4);

function animation() {
    window.requestAnimationFrame(animation);
    holorenderer.render(holoscene, hololens);
}
animation();

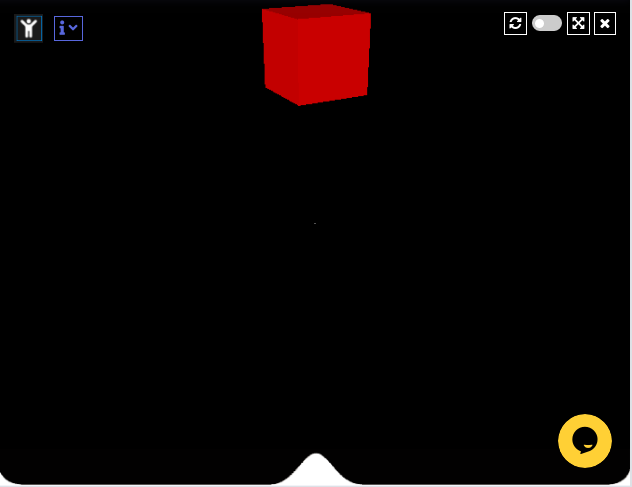
Also, starting from the origin position, to move the box on the z axis closer to the camera (Hololens), the code will change to a +ve value for the z coordinate. You will notice that the box is now very close to the camera, similar to the zoom effect.
boxmesh.position.set(0,0,4);
var hololens = new HoloBuild.HoloCamera();
var holoscene = new HoloBuild.HoloSpace();
var holorenderer = new HoloBuild.HoloRenderer();

var boxgeometry = new HoloBuild.HoloBoxGeometry(0.1,0.1,0.1);
var boxmaterial = new HoloBuild.HoloMeshStandardMaterial( { color: 'red' } );
var boxmesh = new HoloBuild.HoloMesh(boxgeometry,boxmaterial);
holoscene.add(boxmesh);
boxmesh.rotation.set(0.5,0.5,0);
boxmesh.position.set(0,0,0.8);

function animation() {
    window.requestAnimationFrame(animation);
    holorenderer.render(holoscene, hololens);
}
animation();
3D Rotations
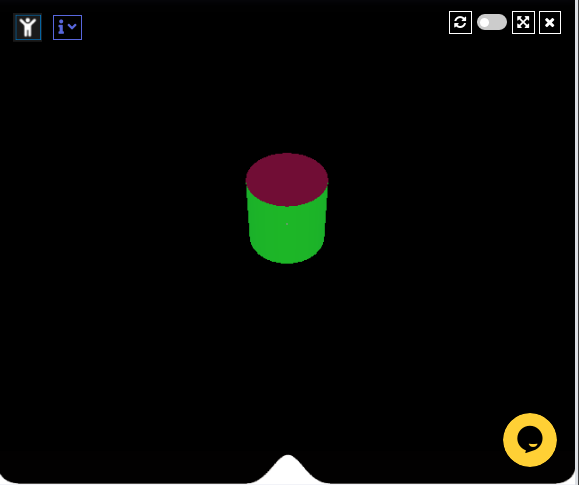
Now that we are familiar with the x, y, z coordinates, let’s go back to explain the Rotate feature that we introduced earlier. To explain the rotations, we're going to use a different mesh. We're going to use a cylinder that has different colors for each cross section. Don't worry about how we created the mesh for now, we will come back to that in later sections. The picture below shows our cylinder without any rotation initially.
All meshes have a rotation property that we can manipulate however we like. This property holds information about the object's rotation around all 3 axes. The rotation values are relative to an object's center. The below code, will rotate the cylindermesh PI/4 radians around the X-axis. This will now let us see the cylinder's top cross section surface.
cylindermesh.rotation.set(3.14/4,0,0);
What do you think will happen if we rotate our initial cylinder around the Y-axis like this?
cylindermesh.rotation.set(0,3.14/4,0);
The cylinder would still look the same!
Now let's try rotating the cylinder PI/4 radians around the Z-axis.
cylindermesh.rotation.set(0,0,3.14/4);
The cylinder will rotate to the left.
Set Image and Creating More Shapes
Set Image
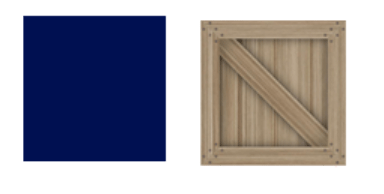
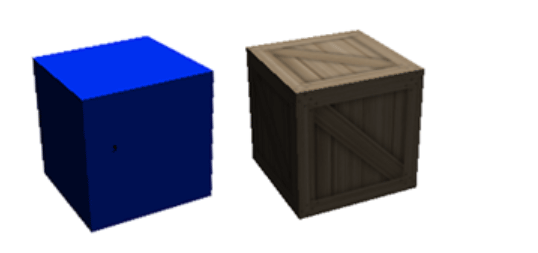
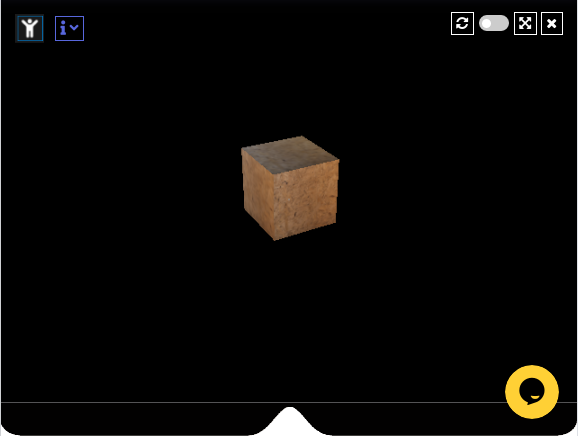
We can dress (cover) the material of the geometry with any image that we like. The setImage feature will set an image on the HoloMesh, it takes as input the image path relative from the file you are calling setImage() from. You can use the following code to set an image as a material.
boxmesh.setImage(‘woodTexture.png');
To set an image, you have to first upload the image to your buildwagon project. For this tutorial, you can download this image to use as texture and upload it to your project. Once you are able to see it in the file explorer on the left side it means the file is now a part of your project! Now you can use the image you just uploaded as a texture for your mesh.
Let's try an example:
var hololens = new HoloBuild.HoloCamera();
var holoscene = new HoloBuild.HoloSpace();
var holorenderer = new HoloBuild.HoloRenderer();

var boxgeometry = new HoloBuild.HoloBoxGeometry(0.1,0.1,0.1);
var boxmaterial = new HoloBuild.HoloMeshStandardMaterial( { color: 'red' } );
var boxmesh = new HoloBuild.HoloMesh(boxgeometry,boxmaterial);
holoscene.add(boxmesh);
boxmesh.rotation.set(0.5,0.5,0);
boxmesh.position.set(0,0,0);
boxmesh.setImage('woodTexture.jpg')

function animation() {
    window.requestAnimationFrame(animation);
    holorenderer.render(holoscene, hololens);
}
animation();
The set image can take other parameters, similar to an object, such as Repeat, Stretch… Feel free to explore and experiment with
the parameters described at the HoloBuild library.
Moving on with our mission, let’s proceed now in creating a ball, then a platform,
then a pyramid!! For ease of explanation, every time we create a new mesh, we will replace it with the one preceding it.
A Ball
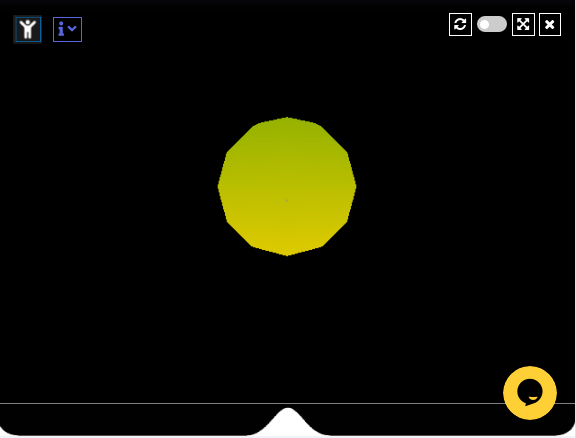
To create a ball, we have to use the geometry shape of a sphere. From the Holobuild library, this is designated by the component: "HoloSphereGeometry". To construct a sphere you need to provide the sphere radius. The code for a sphere in the Holobuild library is:
HoloBuild.HoloSphereGeometry( 0.1);
The radius value 0.1 represents the sphere radius in meters. The radius describes how big the sphere is. Increasing/decreasing the radius will increase/decrease the
size of the sphere respectively.
When you run the code at the emulator, you will get something like this.
var hololens = new HoloBuild.HoloCamera();
var holoscene = new HoloBuild.HoloSpace();
var holorenderer = new HoloBuild.HoloRenderer();

var speheregeometry = new HoloBuild.HoloSphereGeometry(0.1);
var speherematerial = new HoloBuild.HoloMeshStandardMaterial( { color: 'yellow' } );
var speheremesh = new HoloBuild.HoloMesh(speheregeometry,speherematerial);
holoscene.add(speheremesh);

function animation() {
    window.requestAnimationFrame(animation);
    holorenderer.render(holoscene, hololens);
}
animation();
You will notice that we changed the color of the material to yellow.
Another thing you will notice, is that the sphere isn’t really a smooth ball, but sharp and edgy instead. This is because as stated earlier, the shape of the sphere is
formed out of small building blocks which are triangular segments.
What we want in order to make it look smoother like a ball, is to increase the number of segments that it's made out of. We can do that by passing two extra parameters to our geometry constructor-One for the number of horizontal segments and the other for the number of vertical segments.
Our new geometry constructor call will now look like this, where 0.1 is the radius in meters, and 20, 20 are the number of the segments that make up the sphere horizontally and vertically respectively.
var spheregeometry = new HoloBuild.HoloSphereGeometry( 0.1, 20, 20);
The ball will now look like this:
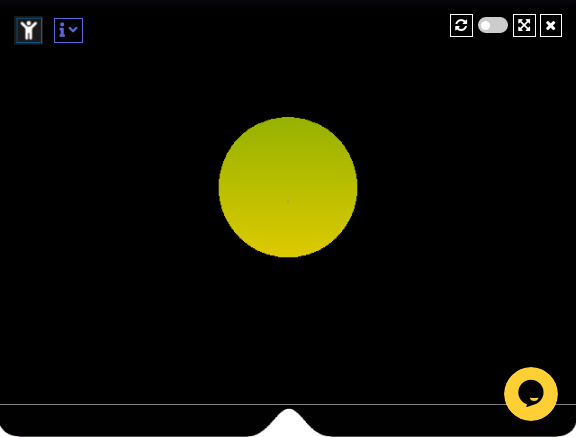
Much better. Later you will notice that choosing a texture for the ball, instead of a color, will make things look even smoother and more realistic.
A Cylinder
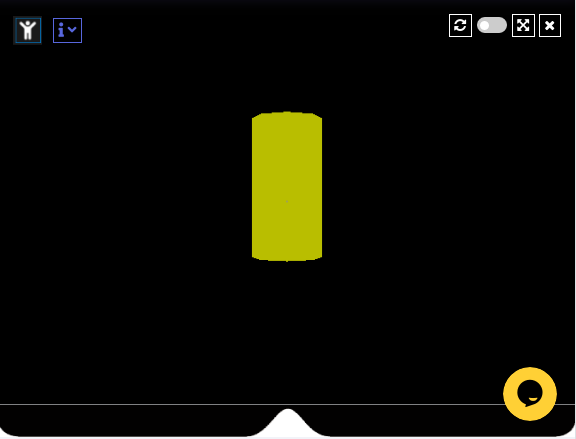
Let's try to create one more shape. The cylinder. To create a cylinder geometry you can do something like the following:
var cylindergeometry = new HoloBuild.HoloCylinderGeometry( 0.05, 0.05, 0.2);
This will create a cylinder geometry that has a 0.05 meters radius at the top and the bottom and is 0.2 meters in height
If you run it on the Emulator, you will get something like this:
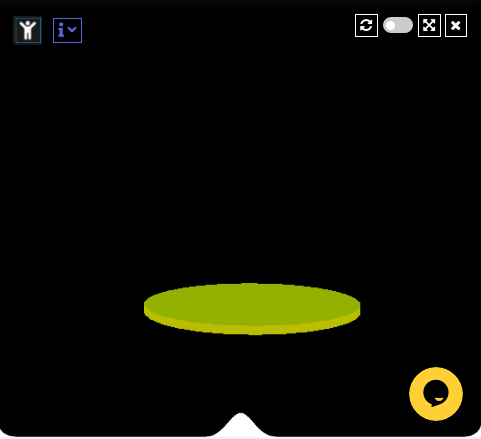
Cylinders are useful in so many different ways. For example we can use them to create platforms to place objects on. All we have to do is decrease the height of the cylinder and increase the radius of our circle to what we see fit for our platform. In that case, our constructor call would look like this:
var cylindergeometry = new HoloBuild.HoloCylinderGeometry( 0.15, 0.15, 0.01);
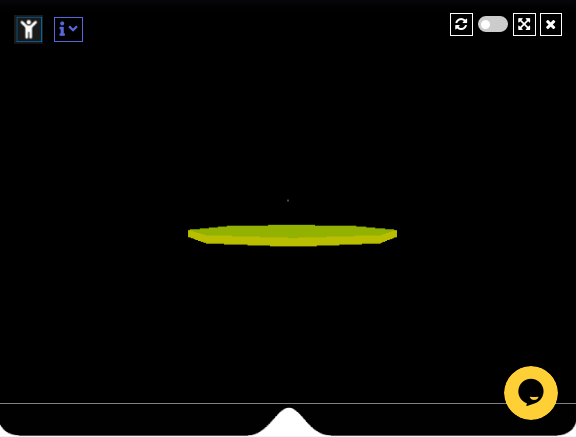
Now don't worry if the cylinder does not appear the same on your machine. This is simply because I used the scene navigation controls to get a higher angle look at the platform. We will go through the emulator camera controls later on in this tutorial.
Similar to the sphere earlier, in order to make our cylinder smoother, we need to add a number of “building blocks” or fillers horizontally and vertically. All we have to do is pass two extra parameters representing the number of segments like we did earlier for the sphere
var cylindergeometry = new HoloBuild.HoloCylinderGeometry( 0.15, 0.15, 0.01, 30, 30);
Emulator Camera Controls
Sometimes, on the emulator, you need to navigate through the scene to look behind objects, maybe even above them. Also, you might need to get a different view of your scene on the emulator. You can do that using the navigation controls listed below:
UP , DOWN: zoom in and zoom out respectively.
CTRL + LEFT or RIGHT or UP or Down: move camera in any direction according to arrow key pressed.
SHIFT + LEFT or RIGHT or UP or DOWN : rotate camera in any direction according to arrow key pressed.
Later on you will see that you can tap on objects in your scene to make them more interactive. To do that on the emulator, just make cure the emulator cursor is on the object you want to tap on, and then right-click on it with the mouse. This emulates the "AirTap" event of the Hololens.
Looping and Animation
Now, let’s work on something cool and extremely important. Whenever there is something changing in the scene, like a rotating object, we have to ask the program to
show us this change. This cannot be done by rendering (drawing) the scene only once; but it has to be rendered repetitively so that we realize the difference in the
scene before the change takes place, and after it happens (in our case, every instance the object rotates and takes a new position). This also true to scenes that are
subject to user interactions, because the scene will change when the interaction takes place.
We can do this by looping the render function.
Render Loop
We have covered so far that by rendering the scene, we ask the program to draw for us what the Hololens (Camera) sees in the space that we have created. When things
are changing in the space due to a specific activity, the hololens needs to re-draw the scene after the activity has occurred. Thus, there is a need to animate the frame
(or scene) in order to observe the change in the activity.
We can do this by calling a function to animate the scene. Let’s explore the code below:
function renderloop(){
    window.requestAnimationFrame(renderloop);
    cylindermesh.rotation.x += 0.01;
    cylindermesh.rotation.y += 0.01;
    holorenderer.render(holoscene, hololens);
}
renderloop();
In the function ‘renderloop’, the line window.requestAnimationFrame(renderloop) asks the hololens to recall this function again and again and again. It recalls it
up to 60 times per second depending on the frame rate.
The code holorenderer.render(holoscene, hololens); will require the scene to be drawn (rendered) every time the function is called, thus we continuously observe any
change occurring in the scene.
If you insert the above code, you should get something like the below (you will notice I added a texture of a woodenbox using “setImage”):
Moving forward, a render function should be included at the end of each project we work on, so that it continuously renders all the changes that are taking place.